





How to Set Up a Plate Carrier: Step-by-Step Guide for Operators

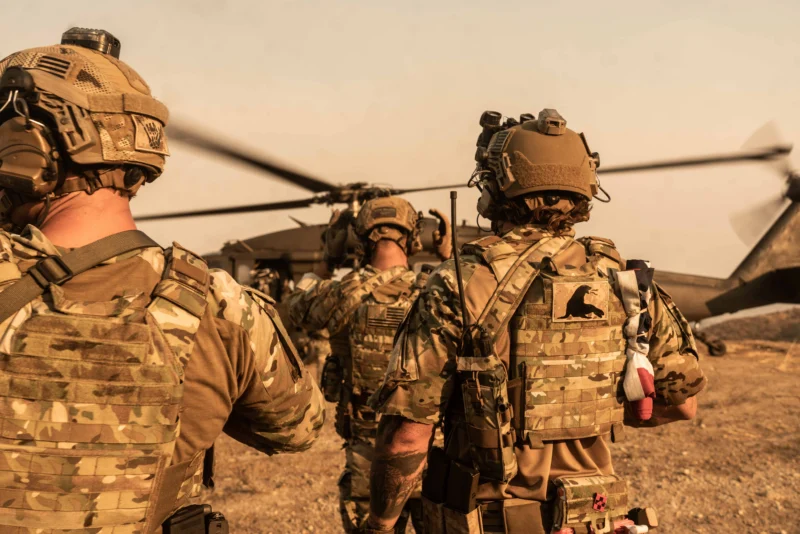
A plate carrier is only as effective as its setup. An incorrectly fitted carrier with poorly positioned pouches and misaligned plates creates coverage gaps, slows access to critical gear, and degrades performance under stress. Whether you are building out a patrol kit, preparing a duty loadout, or setting up a training rig, this step-by-step guide shows you how to set up a plate carrier the right way, from choosing plates and fitting the carrier to final load configuration.
A good plate carrier loadout setup also has to handle a mixed loadout: rifle magazines, pistol magazines, medical gear, communications, and utility items on one carrier. The steps below cover plate selection and fit, front, rear, and side panel layout, magazine and IFAK placement, cable management, weight balance, testing, and example setups by role, so your plate carrier works from the first time you put it on. If you are new to the gear itself, start with our guide on how to wear a plate carrier.
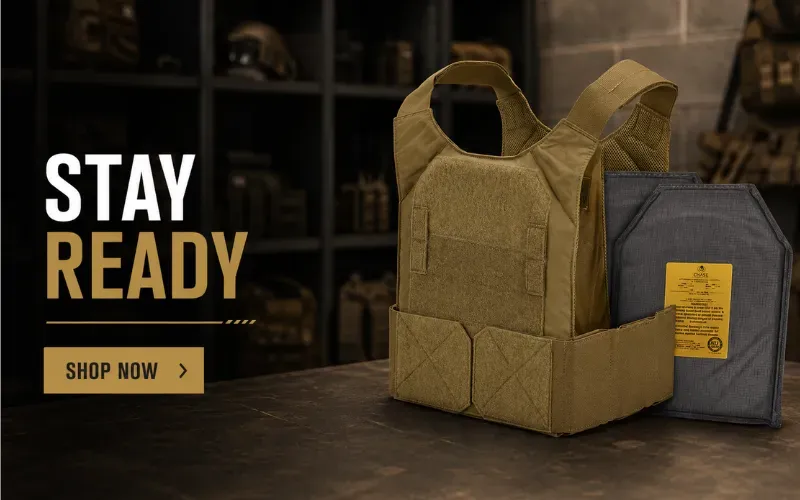
Plate Carrier Setup Checklist: The 6 Steps at a Glance
- Select the right carrier for your role, plate size, and cummerbund needs.
- Select and insert your plates with the cut corners facing up toward the shoulders.
- Fit the carrier to your body by setting front and rear plate height, then cummerbund tension.
- Configure your loadout across the front, side, and rear panels, then route cables.
- Set up medical access with a tourniquet and IFAK reachable by either hand.
- Test under stress with movement, reload, vehicle, and gear access drills.
Step 1: Select the Right Carrier for Your Role
Before you configure anything, you need the right platform. Plate carriers, sometimes called plate carrier vests, are not universal. Key variables include the plate pocket size, cummerbund system, MOLLE real estate, and quick-release capability.
Plate Pocket Sizing
Most operational plate carriers accept 10×12-inch plates, which is the standard SAPI/ESAPI size. Some carriers also accommodate 9×12 or 11×14 plates, depending on body size. Confirm your plate dimensions before selecting a carrier, as a plate that does not fit the pocket correctly will shift under movement and fail to cover the correct zones. SAPI and ESAPI plates come in several sizes, from extra small to extra large, so measure your torso before choosing a plate size. A plate that is too large limits arm movement, while one that is too small leaves vital organs exposed.
Cummerbund System
A MOLLE-compatible cummerbund extends side coverage and provides attachment points for side plates and pouches. A quick-release cummerbund allows rapid shedding of the carrier in a medical emergency or extrication scenario. For operational deployments, a quick-release system is recommended.
Quick-Release Capability
Full quick-release plate carriers allow the entire carrier to be shed with a single pull. This is critical for any role where the carrier may need to be removed rapidly, including medical emergencies, water operations, or vehicle extrications.
For guidance on how your carrier integrates into a full kit, see the Complete Tactical Loadout guide.
Step 2: Select and Insert Your Plates
Your plates determine your protection level. Get this wrong, and the rest of your setup does not matter.
Level III vs Level IV
Level III plates are tested against 7.62x51mm NATO rifle rounds, and many also stop common 5.56x45mm rounds. Check each plate’s documented rating, because some 5.56mm loads such as M855 require a plate rated RF2 or higher. Level IV plates are rated to stop armor-piercing .30 caliber M2 AP rounds. For law enforcement patrol and standard military use, Level III is the most common choice. For high-threat environments involving armor-piercing rifle fire, Level IV is required. Chase Tactical carries a full range of rifle armor plates across these ratings.
For a full comparison of armor protection levels, see the Level IIIA vs Level III Body Armor breakdown and the Chase Tactical Body Armor Levels reference page.
Plate Orientation
Hard plates have a shooter’s cut or swimmer’s cut on the upper corners. The cut corners go toward the shoulder, not downward. This is one of the most common setup errors. The flat-bottom edge sits at approximately the navel level, and the plate should cover the heart, lungs, and upper abdominal organs.
Soft Armor Backing
Many operators run soft armor backer panels behind their hard plates for additional fragmentation and multi-hit protection. This layering strategy is covered in detail in “Can You Wear Soft Armor With Hard Plates?” guide.
ICW vs Stand-Alone Plates
Stand-alone plates are tested to stop their rated threats on their own. In-conjunction-with (ICW) plates only reach their rating when worn over compatible soft armor. If you run ICW armor plates, the soft armor backer is a required part of your setup, not an optional extra, so confirm which backer the plate was certified with.
Plate Curvature and Material
Plate curvature affects comfort and stability. Multi-curve plates follow the natural contour of the torso, reducing pressure points and improving stability during sustained wear. Our comparison of single vs multi-curve plates covers the trade-offs in more detail. Plate materials shape the weight you carry all day:
- Ceramic: Lighter than steel and widely used for Level III and Level IV rifle protection. A strong all-around choice for field use.
- UHMWPE (polyethylene): The lightest option, typically at a higher cost. Confirm the tested threats, since some polyethylene plates are not rated for faster or steel-core rifle rounds.
- Steel: Highly durable and lower in cost, but significantly heavier, and the extra weight adds fatigue over extended wear.
Side Plates
Side plates protect the vital organs under the arms, an area front and rear plates leave open. They mount in the cummerbund or in dedicated pockets such as MOLLE side armor plate pockets. Add side plates only if your threat level calls for them, because they add weight and bulk to the sides of your plate carrier loadout.
Step 3: Fit the Carrier to Your Body
A plate carrier that does not fit correctly will shift under movement, create coverage gaps, and cause fatigue. Get the plate fit right before you configure your loadout.
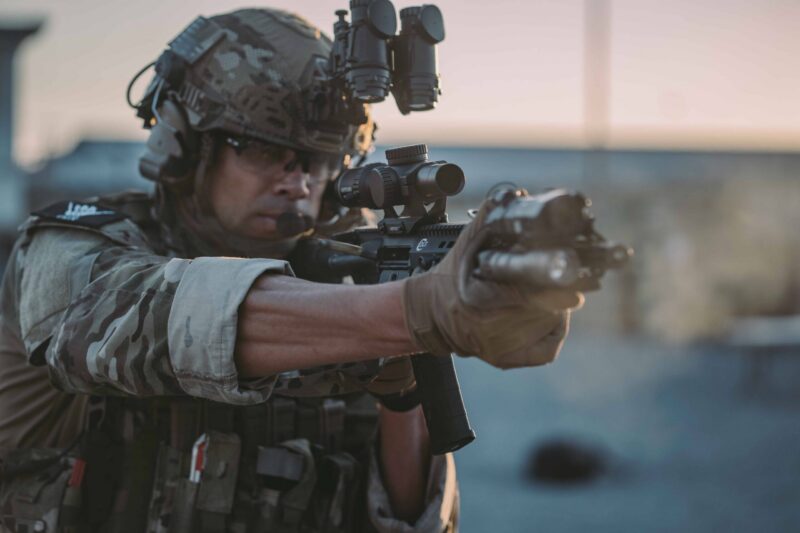
Height Adjustment
Put the carrier on and adjust the shoulder straps so the top of the front plate is just below the sternal notch (the V at the base of your throat). The plate should cover from just below the collarbone to approximately the navel. If the plate rides too high, it will restrict neck movement. If it rides too low, it will not cover the lungs and upper abdomen.
Rear Plate Height
Adjust the rear plate after the front. The rear plate should sit at roughly the same height as the front plate, with its top edge a few inches below the base of the neck, so it covers the same vital organs from behind. If the rear plate sags, shorten both shoulder straps evenly rather than overtightening the cummerbund.
Cummerbund Tension
The cummerbund should be snug enough that the carrier does not shift when you run, drop to prone, or rotate your torso. It should not compress your breathing or restrict your draw stroke. Test mobility by performing a deep squat, a lateral lunge, and a 360-degree shoulder rotation before locking in the adjustment. Our plate carrier cummerbund guide covers cummerbund types and adjustment in more depth.
Shoulder Strap Width
Narrow shoulder straps on poorly fitted carriers will dig into the trapezius under sustained wear. Wider straps distribute weight better. Adjust so the strap sits over the mid-shoulder, not at the neck or on the outer deltoid. Padded plate carrier shoulder pads can also spread the load on long shifts. Keep the area where your rifle stock rests clear of buckles and pouches so you can shoulder a long gun the same way every time.
Sanity Check Under Movement
Once adjusted, perform 10 jumping jacks. The carrier should not move more than half an inch in any direction. If it shifts significantly, tighten the cummerbund or adjust the shoulder straps. A carrier that moves under movement is a carrier that will expose gaps under stress. Make small adjustments one strap at a time, then repeat the test.
For conditioning guidance to maintain performance in full kit, see the Tactical Strength and Endurance training article and How to Build Functional Strength for Tactical Use.
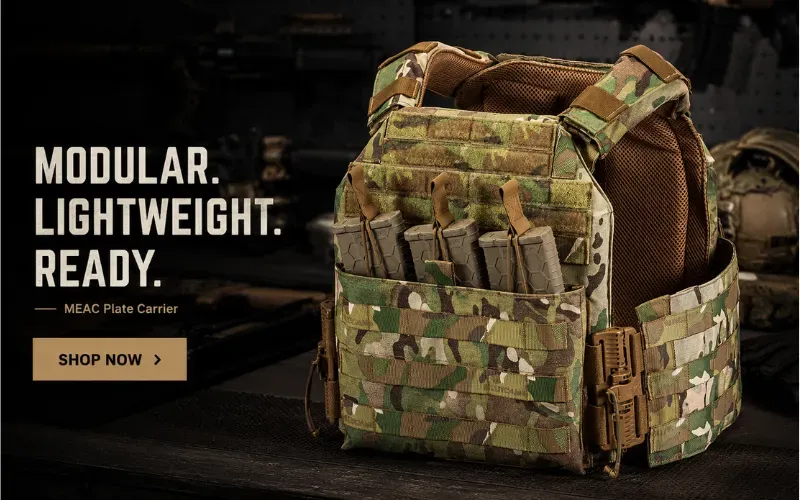
Step 4: Configure Your Loadout on the Front, Side, and Rear Panels
MOLLE (Modular Lightweight Load-carrying Equipment) is the webbing system that allows you to attach pouches, accessories, and equipment to the carrier. Correct MOLLE configuration is what separates a functional operational kit from a gear display. Keep in mind that MOLLE/PALS spacing is standardized, but pouch attachment systems are not always interchangeable, so check fit before you commit to a layout.
The Core Principle: Zoning
Divide your carrier into zones based on access priority. High-priority items go where you can reach them fastest with your dominant or non-dominant hand. Secondary items go where they are accessible but do not interfere with primary draws. Weight should be distributed evenly, left to right, to avoid uneven fatigue and posture issues over long operations.
Front Panel Configuration
The front panel is your primary access zone. Standard front panel configurations for law enforcement and military personnel include:
- Magazine pouches in the center or offset toward the dominant-hand side for fastest reload
- A tourniquet pouch at the upper chest or on the cummerbund, where it can be accessed with either hand
- A radio or communications pouch on the non-dominant side if not running a separate radio harness
Many rifle setups run three magazines across the front in a single row, which keeps the profile flat for prone positions. Place magazines where you can reach them without changing your grip on your primary weapon, and limit front-panel magazine pouches to what your mission actually requires. Overloading the front panel pushes the carrier’s weight forward and creates a protruding profile that catches on obstacles in tight spaces. For a deeper look at magazine placement, see how to organize ammo on your plate carrier.
Front Panel Layout Principles for a Mixed Loadout
- Primary magazines: Support side to centerline, in a consistent order for instinctive access.
- Pistol magazines: Support side or cummerbund, accessible without interfering with the rifle magazine draw.
- IFAK: Front panel or cummerbund, reachable with one hand and never buried behind other pouches.
- Radio/PTT: Front or non-dominant side for frequent one-handed access.
- Single layer only: Stacked pouches push your profile outward and create snag points.
MOLLE vs Velcro Placard Front Panels
Many modern carriers use a hook-and-loop (Velcro) front panel that accepts swappable placards, while others use MOLLE webbing across the front. A placard lets you change the front of your plate carrier setup in seconds, for example switching between a patrol layout and a training layout, while MOLLE gives you more permanent, adjustable pouch positions. Our comparison of MOLLE vs Velcro attachments covers the trade-offs, and a MOLLE Velcro placard lets you run MOLLE pouches on a hook-and-loop front.
Combining Rifle and Pistol Magazines
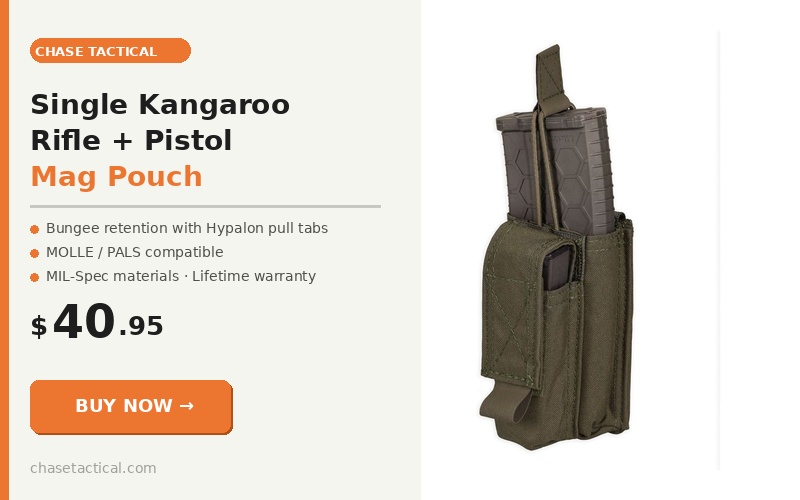
Many mixed loadouts carry both rifle and pistol magazines. A combined pouch saves MOLLE space and keeps the front panel clean. The Single Kangaroo Rifle + Pistol Mag Pouch holds one standard 5.56mm rifle magazine with bungee retention and Hypalon pull tabs, plus one pistol magazine compatible with most service pistols, in heavy-duty 500D nylon. You can also build out the front panel with dedicated rifle mag pouches and pistol mag pouches.
Side Panel and Cummerbund Configuration
The cummerbund forms the side panels of your carrier and is the most underutilized MOLLE real estate on most carriers. Use it for items you need one-handed access to, such as medical supplies, a backup magazine, or a dump pouch. For IFAK placement, see the IFAK contents and setup guide for guidance on what to carry and where to mount it. Avoid overloading one side of the cummerbund, because lateral imbalance affects pivoting and transitions between positions.
Rear Panel Configuration
The rear panel is for the secondary gear that does not need immediate access. Hydration reservoir compatibility, admin pouches, and additional ammunition storage are common rear panel configurations. Avoid mounting heavy items on the rear panel if you will be spending extended time in a vehicle, as back-panel gear will force you forward in the seat and fatigue your lower back.
Keep the rear panel slim. Rear bulk shifts weight backward, throws off your center of gravity, and creates drag when moving through confined spaces or entering and exiting vehicles. Position heavier rear-panel items as centrally and as close to the body as the carrier allows, and reserve rear slots for gear you can reach over your shoulder or that a teammate can access, such as spare magazines or breaching tools. Common rear panel items include hydration carriers, admin pouches, and secondary radio pouches. For setups built around specific terrain and missions, see our guide to plate carrier setups for different environments.
Weight Distribution Rule
A common guideline is to keep the total loaded carrier weight during extended operations under roughly 25 to 30 percent of the operator’s body weight. Beyond this range, fatigue, movement degradation, and injury risk increase. Prioritize what goes on the carrier. Everything that can go on a belt or chest rig without compromising access should be evaluated for relocation.
For chest rig integration as a complement or alternative to a plate carrier, see the Chest Rig buying guide.
Balancing Weight Front to Back and Side to Side
Keep the center of gravity centered and close to your body, roughly in line with your sternum and spine. A front-heavy configuration creates a forward lean that strains the lower back. A rear-heavy configuration pulls the carrier backward and shifts the plates out of position. Heavier items, such as plates, a radio, and triple magazine pouches, should sit as centrally and as close to the body as possible, with lighter accessories filling peripheral positions.
What to Keep on the Belt Instead of the Carrier
Not everything belongs on the plate carrier. Gear you need with or without the carrier, such as a pistol, a spare pistol magazine, and a tourniquet, is often better on a battle belt or duty belt so it stays with you if you shed the carrier. Moving lighter, lower-priority items to the belt also frees front panel space and reduces carrier weight.
Cable Management and Snag Hazards
Radio cables, PTT wires, antenna leads, and hydration tubes all need to be routed before the setup is finished. Run cables under the MOLLE webbing or along the shoulder straps rather than across the front panel, place the PTT where your non-dominant hand finds it without looking, and secure loose strap ends with elastic keepers or rubber bands. Anything that dangles or flaps can snag on doorframes and vehicle seats or make noise when you move.
Low-Profile and Concealable Setups
Not every plate carrier setup needs a full front panel. For low-profile work, concealment under a jacket or uniform matters more than MOLLE space. A slick carrier with minimal pouches, or one of our low-vis concealable carriers, keeps your profile flat while still carrying plates. Keep these setups to the essentials, such as plates, a tourniquet, and a spare magazine, and move everything else to a bag or belt.
Step 5: Set Up Your Medical Access
Every operational plate carrier setup should include access to trauma medical care. This is not optional, and it is one of the most important safety decisions in your setup.
At minimum, a tourniquet mounted for one-handed access and a dedicated IFAK pouch should be on the carrier or immediately accessible. The tourniquet should be mounted where the operator can reach it with either hand without removing the carrier or significantly adjusting their grip. Many operators carry two tourniquets, one on the carrier and one on the belt, so one is always within reach.
Chase Tactical carries a full line of medical kits and IFAK pouches designed for carrier-mounted deployment. For a complete breakdown of what belongs in an IFAK, see the IFAK contents checklist linked above.
IFAK Essentials Checklist
- Tourniquet within immediate reach, not buried inside the kit, in a dedicated tourniquet pouch
- Trauma shears, kept accessible in a trauma shear pouch
- Compressed gauze or a hemostatic agent
- Chest seal for penetrating chest wounds
- Nitrile gloves
Tactical Combat Casualty Care (TCCC) guidelines prioritize early tourniquet use for life-threatening limb bleeding, which is why tourniquet accessibility, not just presence, matters in IFAK placement. Wherever you mount the kit, you should be able to find and open it by touch alone, ideally with your non-dominant hand. A rapid deploy IFAK pouch lets you pull the kit out quickly without removing the whole pouch from the carrier.
Step 6: Test Under Stress Before Deployment
A plate carrier setup that works at the range may fail in a dynamic scenario. Before any operational deployment, test your configuration under realistic conditions.
Gear Access Test
Without looking, reach for each piece of gear on your carrier in sequence. If you cannot consistently access what you need under stress, reposition it. Muscle memory for gear access is built through repetition. Your setup needs to be consistent every time you put the carrier on.
Transition Test
Run a loaded carrier while transitioning between positions (standing to kneeling, kneeling to prone, prone to standing). Check for MOLLE attachments that snag, straps that loosen, or pouches that shift. Adjust before deploying.
Draw and Reload Test
If you are running a holster on a plate carrier or cummerbund, test your draw and reholster at full speed in all positions. Carrier-mounted holsters require adjustment compared to belt holsters due to the changed angle and position.
Vehicle and Range of Motion Test
Raise both arms overhead, rotate your torso, and enter and exit a vehicle in full kit. Run simulated reloads and medical access under time pressure, and check maneuverability in the situations your role actually involves. Then wear the full setup for at least an hour or two to find hot spots, and listen for any gear that rattles or makes noise. Identify any pouches that block each other, straps that interfere with draws, or items that move out of position, then run the same test again. A well-configured plate carrier loadout should feel like an extension of your body rather than something strapped to it.
Inspect and Maintain Your Setup
Inspect stitching, buckles, webbing, and pouch attachment points regularly, and always before reinserting plates after cleaning. Remove plates and accessories before cleaning, brush dirt from the MOLLE webbing, spot clean with mild detergent, and air dry completely away from direct heat. Re-run your access and movement tests after any change to your loadout.
Example Plate Carrier Setups by Role
Every plate carrier setup should start from the role, not from the gear. These example layouts show how the same principles apply in different scenarios. Treat them as starting points, then adjust them to your agency SOPs, unit standards, or personal needs.
Patrol Officer Setup
Front: two or three rifle magazine pouches and a radio pouch, often on a placard. Cummerbund: a tourniquet and a pistol magazine. Belt: duty pistol, handcuffs, a flashlight, and a second tourniquet. Keep the front panel flat enough to work in and out of a patrol vehicle.
Military Rifleman Setup
Front: three rifle magazines in a single row, plus a pistol magazine if a sidearm is carried. Cummerbund: an IFAK and one of our dump pouches, with side plates if the threat calls for them. Back: hydration and buddy-access items such as spare magazines or a breaching tool.
Medic Setup
Front: fewer magazines to free space for medical access. Sides and back: an expanded medical kit, extra tourniquets, chest seals, and trauma shears in quick-access medical pouches. A rear medical pouch should open toward a teammate so they can reach it.
Low-Profile and Home Defense Setup
Plates, one or two magazines, a tourniquet, and a light. Speed of putting the carrier on matters more than capacity, so keep it staged with everything already attached and adjusted to your body.
Common Setup Mistakes to Avoid
Running plates upside down. The cut corners go up toward the shoulder. This is the single most common error in first-time carrier setups.
Over-packing the carrier. More gear is not better gear. An overloaded carrier degrades mobility, increases fatigue, and creates more surfaces to snag. Build your loadout around the mission, not around filling available MOLLE.
Ignoring the cummerbund adjustment. Most operators adjust the shoulders and leave the cummerbund as-is. The cummerbund is what keeps the carrier stable under movement. It needs to be adjusted whenever body composition or base-layer thickness changes.
No medical on the carrier. A carrier without accessible medical is incomplete. Mount a tourniquet within reach of both hands, and carry a functional IFAK.
Skipping the stress test. Gear setups that are never tested under movement and stress will fail when it matters most. Train in your configuration before you operate in it.
Stacking pouches. Mounting pouches on top of other pouches pushes your profile outward, creates snag points, and blocks access to the gear underneath. Keep every pouch in a single layer.
Leaving cables loose. An unrouted radio cable or hydration tube snags on doorframes and seats. Route and secure every cable before you call the setup finished.
Conclusion
Knowing how to set up a plate carrier comes down to building it in order. Start with plates matched to your threat environment, fit the carrier to your body, then work outward through the front, side, and rear panels based on access priority and weight. The front panel carries what you need fastest, the side panels carry what you need one-handed, the rear panel carries what sustains you, and the medical kit sits where you can find it without looking. Route your cables, test the full loadout under realistic movement, refine it, and test again. Start minimal, and add gear only when training shows you need it.
Build Your Operational Kit With Chase Tactical
Chase Tactical plate carriers are MOLLE-compatible, built to MIL-SPEC standards, and designed for operators who need gear that performs in the field, not just on the range. Pair your carrier with the right plates, pouches, plate carrier accessories, and medical to build a complete, mission-ready kit.
Frequently Asked Questions
How do you set up a plate carrier step by step?
Choose a carrier that fits your plate size and role, insert the plates with the cut corners facing up, and adjust the shoulder straps so the front plate sits just below the sternal notch. Then tighten the cummerbund, mount pouches on the front, side, and rear panels by access priority, add a tourniquet and IFAK, route your cables, and test the setup under movement.
Where should plates sit on a plate carrier?
The top of the front plate should sit just below the sternal notch, covering the heart, lungs, and upper abdominal organs. The cut corners face up toward the shoulders.
How tight should a plate carrier be?
Tight enough that it does not shift during running or dynamic movement, but not so tight that it restricts breathing or your draw stroke. Test by performing jumping jacks and deep squats after adjustment.
What is the correct MOLLE pouch placement for magazines?
Magazine pouches should be positioned where your dominant or non-dominant hand can access them without crossing your body. The center chest or an offset to the dominant side are both common and proven placements.
Should I run a tourniquet on my carrier?
Yes, always. A tourniquet mounted for one-handed access is a minimum medical requirement for any operational plate carrier setup. Mount it where both hands can reach it independently.
How do I know if my carrier fits correctly?
The front plate should cover from just below the collarbone to approximately the navel. The cummerbund should allow full breathing and a complete shoulder rotation. The carrier should not shift more than half an inch in any direction during movement.
What belongs on the back panel of a plate carrier?
The back panel is for gear you do not need immediately, such as a hydration carrier, an admin pouch, spare ammunition, or a secondary radio. Keep it slim and keep heavier items centered and close to the body.
Where should the radio go on a plate carrier?
Mount the radio on the front or non-dominant side if you need frequent one-handed access, or on the back panel if you run a separate PTT. Keep it from blocking your magazine pouches or medical kit.
Should I use MOLLE or a Velcro placard on the front panel?
Use a Velcro placard if you want to swap front panel layouts quickly between roles or training and duty. Use MOLLE if you want permanent, adjustable pouch positions. A MOLLE Velcro placard lets you combine both on one carrier.
How do I choose the right size plate carrier?
Measure your chest at its widest point and your torso from collarbone to navel, then compare those measurements with the carrier’s sizing chart. When properly adjusted, the top of the front plate should sit just below the sternal notch, and the cummerbund should be snug without restricting your breathing or torso rotation.
Can I use a plate carrier for non-military activities?
Yes. Plate carriers are used across law enforcement, private security, competitive shooting, and civilian preparedness roles. The same setup principles apply in every context: protection level matched to the threat, fit adjusted for your body, and gear placed for the access priorities of your use case.
How do I clean and maintain a plate carrier?
Remove all plates and detach accessories before cleaning. Brush loose dirt from the MOLLE webbing, then spot clean soiled areas with mild detergent and a soft brush. Rinse and air dry completely, and never machine wash with plates inserted or dry the carrier in direct heat. Inspect stitching, buckles, and webbing before reinserting plates.
What are lightweight alternatives to steel plates?
Ceramic and UHMWPE (ultra-high-molecular-weight polyethylene) plates both offer significant weight savings over steel. Ceramic plates are widely used for Level III and Level IV protection, while UHMWPE is usually the lightest option at a higher price. Both are better suited to extended wear than steel.
How do I stop my plate carrier from bouncing?
Tighten the cummerbund so the carrier cannot shift when you run, then shorten both shoulder straps evenly so the plates sit high and close to the body. Keep heavy pouches centered and close to the carrier, because weight far from the body increases bounce.
Should I put my handgun on my plate carrier?
You can, but most users keep the pistol on a belt so it stays with them if the carrier comes off. If you mount a gun holster on the carrier or cummerbund, practice the draw at full speed in every position, because the angle differs from a belt holster.
How many magazines should a plate carrier hold?
Many rifle setups carry three magazines on the front panel plus one in the rifle, with more on the belt or back for longer missions. Carry what your role requires and no more, because every extra magazine adds weight.