





Top Accessories to Upgrade Your Ballistic Helmet Setup


The right ballistic helmet accessories turn a protective shell into a setup you can wear, balance, and work in for hours. A bare helmet gives you head protection. Night vision mounts, rail systems, retention upgrades, padding, and covers decide whether that helmet stays stable, comfortable, and ready for your mission.
This guide covers which accessories to add first, what each one does, and how to check compatibility with your helmet cut before you buy. If you are still deciding on a shell, start with our overview of ballistic helmets and the guide to choosing a helmet for your mission type, then build your accessory list around it.
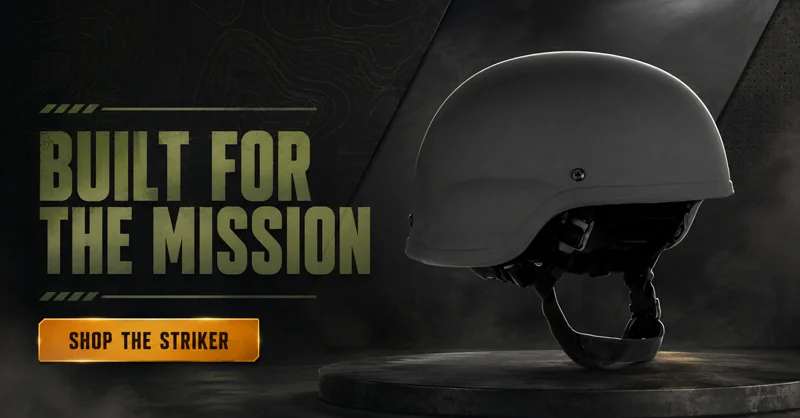
Best Ballistic Helmet Accessories to Add First
If you are starting from a bare helmet shell, not every accessory carries equal weight. These are the additions that make the biggest difference first, in the order most users should tackle them:
- Retention system and chin strap, since a helmet that shifts or comes loose undermines every other accessory mounted to it.
- Night vision shroud and mount, if your mission profile includes low-light or no-light operations.
- Communication headset, for teams operating in noisy or dynamic environments.
- Interior padding upgrade, for comfort and stability during extended wear.
- Rail-mounted lights or cameras, added once the core system is dialed in.
Once these are in place, counterweights, covers, eye protection, and storage solutions round out a fully upgraded setup. You can browse the full range in our helmet accessories category.
Why Accessories Matter for Your Ballistic Helmet Setup
The helmet shell provides the core protection. Accessories decide how usable that protection is. Night vision capability, communications, balance, and eye protection all come from the pieces you add, and the right combination reduces fatigue, improves agility, and keeps your gear working together instead of against each other. The best tactical helmet accessories are the ones that solve a specific problem in your setup, not the ones that simply add more hardware.
A modular helmet system also lets you adjust for different settings, including urban, desert, woodland, maritime, and domestic law enforcement operations. Get mission-ready with the Level IIIA Mid-Cut Helmet from Chase Tactical.
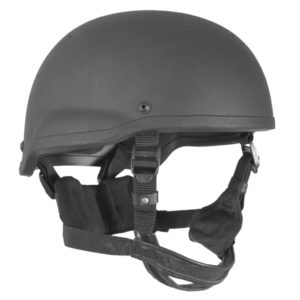
Ballistic Helmet Attachments and Upgrades Worth Considering
People often search for ballistic helmet attachments, tactical helmet attachments, and helmet upgrades as if they were the same thing. In practice, an attachment is hardware that mounts to the shell, while an upgrade improves something the helmet already has, such as its fit or retention. Keeping the two apart makes it easier to plan a purchase and avoid buying parts you do not need.
Tactical Helmet Attachments
Attachments mount to the shell through its shroud, rails, or hook and loop areas. Common examples include:
- NVG shrouds and mounts
- Rail systems and rail accessories
- Lights, including a ballistic helmet light, and cameras
- Communication headsets and ear protection
- Visors and face shields
- Hook and loop panels for patches and IR markers
Each attachment adds weight and uses mounting space, so add them one at a time and check the balance after each addition. The numbered sections below explain how each one works.
Helmet Upgrades
Upgrades improve the helmet you already own. The most useful ones are retention and chin strap upgrades, interior padding, helmet covers, and counterweights. For ACH helmet upgrades in particular, retention and padding are a sensible place to start because they affect every hour you wear the helmet.
Powering Lights and Night Vision
Lights, NVGs, and some headsets need power, which means planning a battery solution. A rear battery pack can double as a counterweight and keep the helmet balanced. Route cables along the rail so they do not snag, confirm that the pack fits your helmet and cover, and remove batteries when you store the kit. Check battery type and runtime with the manufacturer for each device.
Night Operations and Communication Accessories
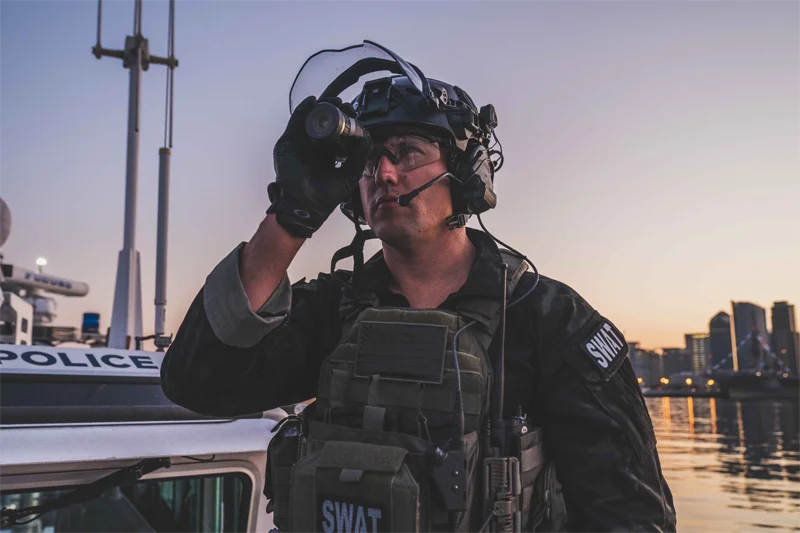
1. Night Vision Shrouds and Mounts
Night vision devices (NVDs) are crucial for missions in low-light or no-light situations. To mount them securely, your helmet needs a front shroud, typically polymer or metal, that accepts NVG arms or brackets. Chase Tactical’s NVG shroud and NVG retention kit are both built for this. For a deeper breakdown of shroud types and placement, see our guide to night vision mounts, and check night vision helmet rig compatibility before you commit to a configuration.
A mount lets you flip the goggles up or down and fine-tune the fit. Unsecured NVDs are hard to stabilize, which reduces their usefulness and exposes them to damage from impacts. If you rely on NVGs regularly, an adjustable, durable mount is not optional.
2. Identification and Signal Systems
Helmet-mounted strobes and IR beacons improve visibility and recognition. They are especially useful on joint force missions or at night, when friendly forces need to identify each other quickly.
IR strobes are visible through night vision equipment, so they can mark your position without a visible light. Some models offer multiple modes, such as flashing and steady.
3. Communication Headsets and Hearing Protection

Clear communication in high-stress situations can be a matter of life and death, which is why a headset is a top priority for many teams. Active hearing protection with ambient sound amplification improves situational awareness while protecting your ears from damage.
Headsets mount either directly to helmet rails or through under-helmet mounts. They typically feature boom mics that link to tactical radios for hands-free talking. Integrated communications are essential for coordination and safety in teams operating in noisy, dynamic environments.
Comfort, Balance, and Retention Upgrades
4. Counterweights and Battery Packs

Front-mounted devices, such as NVGs, tilt the helmet forward, which leads to neck strain and loss of balance. Counterweights, typically attached at the back, help distribute weight evenly.
Some configurations combine a counterweight with a battery pack that powers NVGs, lights, or communication equipment while keeping the helmet balanced. These usually attach with hook and loop or strap systems and sit low-profile so they do not catch on other accessories. A balanced helmet supports stamina and reduces fatigue, particularly on long missions or patrols.
5. Retention Systems and Chin Straps
The retention system is one of the most overlooked parts of a ballistic helmet setup. A snug, comfortable chin strap keeps the helmet in place during dynamic movement or when carrying additional gear.
Advanced retention systems include padded chin cups, four-point harnesses, and release buckles. These improve comfort and make donning and doffing easier, allowing quick removal in an emergency. Retention upgrades matter most for heavy NVG configurations and harsh environments. Many chinstrap designs also offer adjustment points, which gives you more customization for different head sizes and for wearing a headset or ear protection.
6. Internal Padding and Comfort Liners
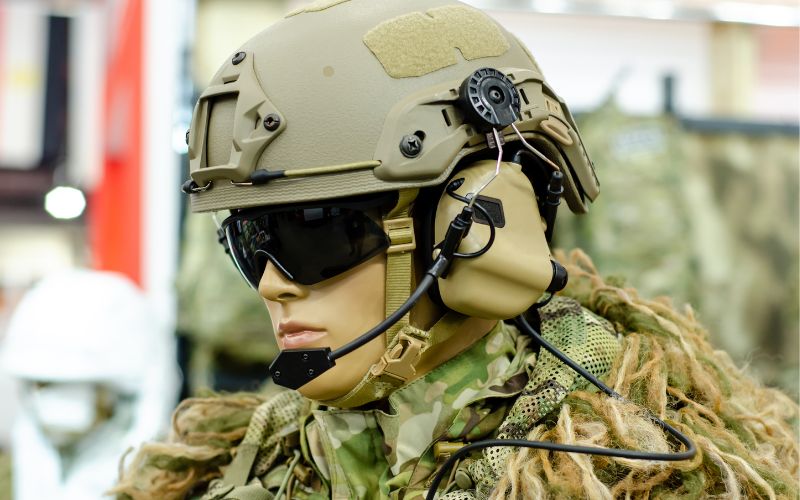
Stock cushioning on most tactical helmets tends to be sparse. A padding upgrade helps the helmet sit consistently on your head, which reduces pressure points and keeps it stable when you move. Look for pads that offer:
- Memory foam or gel for a personalized fit
- Breathable materials that help sweat evaporate
- Modular construction so you can fine-tune the fit
Comfort is not a luxury. It improves concentration and mobility on the ground.
Mounting, Modularity, and Rail Systems
7. Helmet Covers
A helmet cover is often the first accessory added to a tactical helmet, and it does more than change the look. A properly fitted cover protects the shell surface from weathering and UV exposure and can help with camouflage. Most covers are made from abrasion-resistant materials such as Cordura and include hook and loop panels for patches, IR markers, and signal strobes. Many pair with a hook and loop system for quick patch changes. A ballistic helmet cover also comes in a range of colors and camouflage patterns, such as MultiCam, so you can match your environment. The cover needs to match your helmet’s cut and size, which matters most for a mid cut helmet cover, since a cover made for a different shape may not sit correctly.
The right cover keeps rail attachments and NVG mounts accessible and helps secure loose wires so they do not become snag hazards in heavy terrain.
8. Helmet Rail Systems and Lights
A helmet rail system adds mounting points for lights, cameras, and other ballistic helmet attachments. Rails are often built into the side of high-cut or mid-cut helmets and support modular gear such as:
- Tactical lights and flashlights
- Cameras
- Oxygen masks
- Ear protection systems
If a flashlight is part of your loadout, a dedicated flashlight pouch keeps it secured and ready to grab. One of the most useful functions of a rail system is cable management. Good routing and clips keep cords from interfering with movement or sight. Helmet rail accessories, such as a ballistic helmet light, should match the rail type on your helmet, so confirm the interface before you buy.
Eye Protection and Storage
9. Goggles, Visors, and Eye Protection
Goggles and visors are not part of the helmet shell, but they complete head protection. Goggles should be impact-rated and fit snugly over the helmet’s rim without creating pressure points. Look for anti-fog and UV protection, and for designs that work with helmet rails or retention bands so they stay secure in motion.
Some setups add a visor or face shield that attaches to a compatible rail or shroud. A visor has its own rating, separate from the helmet’s, so check what the manufacturer states for the specific product and confirm it fits your helmet before you buy.
10. Helmet Storage and Protection
Your equipment is only as good as its condition. A padded helmet carry bag keeps your helmet safe in transit and in storage, with room for NVGs, cables, batteries, and other accessories. A bag also keeps your kit organized and protects it from moisture, dust, and impact.
Ballistic Helmet Setup Examples by Mission
There is no single correct tactical helmet setup. The right build depends on what you do, so use these examples as starting points and adjust them to your helmet, your gear, and the guidance of your agency or team.
Patrol and Law Enforcement Setup
Patrol work rewards comfort, quick adjustment, and clear communication. A typical build starts with a reliable chin strap and padding, then adds a headset or ear protection and a rail-mounted light if the job calls for it. Keep the profile low so the helmet does not snag on vehicles and doorways. For background on how teams choose, see why police and SWAT teams use ballistic helmets.
Low-Light and Night Operations Setup
A night setup adds a shroud and mount for NVGs, an IR strobe or other identification marker, a battery pack, and a counterweight to offset the front weight. Many military helmet accessories fall into this group. Check each part against the others so the NVG can flip up and down without contacting the headset or cables. Our guide to tactical helmets for law and military use adds more context on how requirements differ.
Training and Range Setup
For training, a non-ballistic bump helmet with a cover, padding, and a retention upgrade can be enough, and it keeps weight down. If you train with lights or communications, mount only what the drill needs. Bump helmet accessories vary by model, so check the mounting points first.
Quick Check Before You Use a New Setup
- The helmet stays level when you look up, down, and side to side.
- There are no pressure points after extended wear.
- Your headset or ear protection fits without breaking the seal or shifting the helmet.
- Cables are routed clear of your movement and your line of sight.
- The NVG flips up and down without contacting other parts.
How to Choose Ballistic Helmet Accessories for Your Helmet and Mission
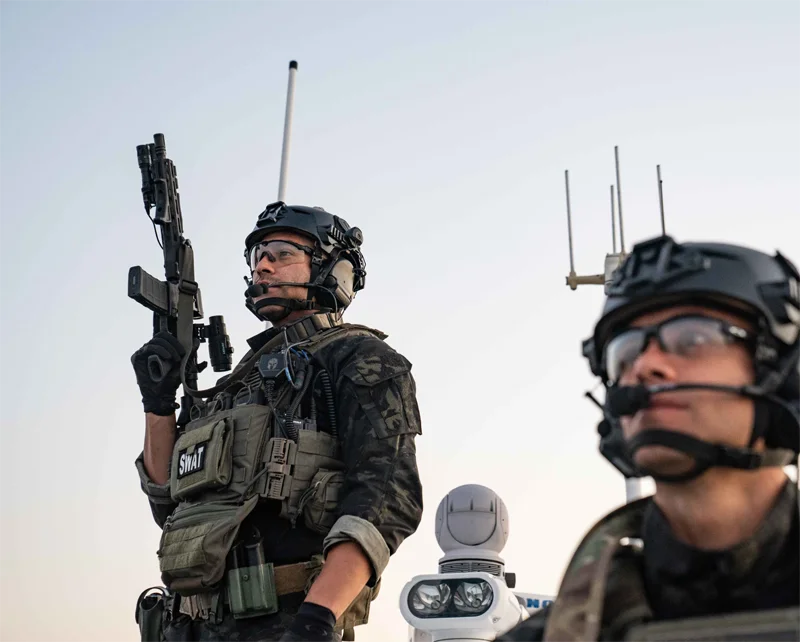
Not every accessory fits every helmet the same way. Compatibility depends on cut type and helmet category, so confirm your helmet’s specifications before you buy rail or NVG hardware. A simple process helps:
- Identify your helmet cut and model. Standard, mid, and high cuts differ in available mounting space.
- Check the mounting points. Look for the shroud, side rails, and hook and loop areas your accessories will use.
- Match accessories to your mission. Add only what has a clear purpose, starting with retention, then night vision or communications if you need them.
- Test the balance and fit. Wear the helmet with your full kit and confirm it stays stable, with no pressure points and no snagging cables.
Protection level matters too. If you are comparing ratings before building out an accessory loadout, our guide to NIJ ratings explains what each level covers. For help with the bigger choice, see combat helmets vs. ballistic helmets and bump helmet vs. ballistic helmet.
ACH Helmet Accessories for Standard, Mid, and High Cuts
The Advanced Combat Helmet (ACH) shell is one of the most common ballistic helmet platforms, and Chase Tactical carries it in a standard-cut, mid-cut, and high-cut ACH helmet. Standard, mid, and high cuts all support rail and shroud mounting, but the placement and available space differ between them. That is why high cut helmet accessories are not always interchangeable with those for a standard cut, and why you should verify your exact cut and model before adding rail or NVG hardware. Whether you are planning ACH attachments or a complete ACH helmet setup, start from the cut you own.
If you already own a different style of helmet, do not assume ACH accessories fit it. Mounting layouts can differ between helmet designs, so check compatibility first. This applies to FAST helmet accessories as well as any other platform: match accessories to your helmet’s mounting points. The same is true if you are searching for Kevlar helmet accessories, since compatibility depends on the mounting hardware on the helmet, not on the shell material.
Accessories for Bump Helmets
Many of the same upgrades, including covers, padding, and retention, can apply to a non-ballistic bump helmet, which is worth considering for training use. Mounting hardware varies by model, so confirm what your bump helmet supports. Our guide on whether a bump helmet is enough for urban tactical operations covers where bump helmets fit.
Mid-Cut and High-Cut Helmet Accessories: What Changes
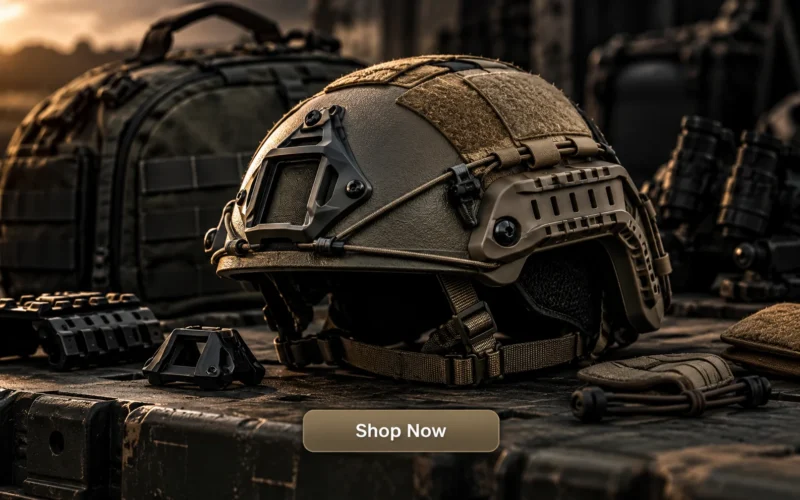
The cut of the helmet shapes which accessories work best. In general, a high-cut shell is trimmed higher around the ears, which leaves more room for headsets and ear protection, while a mid-cut shell sits lower and covers more of the head. A standard-cut helmet generally offers the most coverage. These differences affect more than comfort. They change where rails sit, how much space a headset has, and which cover or pad set fits.
Choosing a Mid-Cut Helmet Setup
A mid-cut setup balances coverage and clearance. Check that your headset or ear protection sits correctly, confirm that any cover is made for a mid-cut shell, and make sure the rails and shroud line up with the accessories you plan to mount.
Choosing High Cut Helmet Accessories
High cut helmet accessories tend to center on headset compatibility and rail use. Because there is more ear clearance, this cut is often paired with headsets and ear protection systems. Verify the fit of your headset, pads, and cover against your exact model before you buy.
Caring for Your Helmet Accessories
Accessories last longer with basic routine care. Follow the manufacturer’s instructions for each product, and use these habits as a baseline:
- Inspect straps, buckles, and mounting hardware regularly for wear, cracks, or loosening.
- Let pads and liners dry fully after use, and clean them as the manufacturer directs.
- Remove batteries from powered accessories before long-term storage.
- Store the helmet and accessories in a bag, away from moisture and direct impact.
For more general advice, see our guide to tactical gear maintenance and care. If you are building a complete head protection plan, our head protection loadout guide is a good next read.
Chase Tactical Helmets and Accessories to Build Around
If you are looking at a Chase Tactical helmet, start with the shell, then add accessories that match its cut. These are the products covered in this guide, and the ones to look at first:
- Striker ACH standard-cut ballistic helmet
- Level 3A ACH mid-cut ballistic helmet
- 3A ACH high-cut ballistic helmet
- Level IIIA ACH tactical combat helmet
- Tactical bump helmet (non-ballistic)
- Ballistic helmet rail system
- Unity Summit NVG shroud and NVG bungee retention kit
- Helmet hook and loop system
- Helmet carry bag
Open the linked product pages in this guide to review specifications and compatibility before you order. If you want to see how a bump helmet differs from a ballistic one, our guide to the tactical bump helmet is a useful companion.
Build a Helmet Setup That Fits Your Mission
The difference between a standard helmet and a fully optimized one comes down to accessories. Every upgrade, from internal pads to external mounts, should have a specific purpose. Whether you work in law enforcement or are preparing for unpredictable situations as a civilian, a well-planned setup is about being ready, not about looks.
Define your mission profile, assess the conditions you will face, and configure your loadout from there. When the pieces work together and stay balanced, you get a helmet that protects and performs.
Frequently Asked Questions
What are the most common ballistic helmet accessories?
The most common additions are a retention system with a chin strap, a night vision shroud and mount, a rail system, interior padding, a helmet cover, and a communication headset. Counterweights, battery packs, lights, and signal systems are common additions for night operations.
How do I attach accessories to a ballistic helmet?
Most accessories attach through the helmet’s rails, shroud, or hook and loop areas. Identify your helmet cut and model, check which mounting points it has, and follow the accessory manufacturer’s installation instructions. Test the fit and balance with your full kit before use.
Can I add night vision to a ballistic helmet?
Yes, if the helmet has a compatible front shroud. A shroud and mount hold the NVG securely, and a retention kit helps keep it stable. A counterweight can offset the added front weight.
Can I use a communication headset with a ballistic helmet?
Yes. Headsets typically mount to the helmet rails or use under-helmet mounts, and boom mics connect to your radio for hands-free communication. Confirm that the headset you choose is compatible with your helmet.
Do high-cut and mid-cut ballistic helmets use the same accessories?
Many accessories, such as rail-mounted lights and communication headsets, work across both cuts, but the exact mounting points and shroud placement can vary by cut type and model. Confirm compatibility against your specific helmet before buying rail or NVG hardware.
Do I need a counterweight if I am not running night vision?
Counterweights mainly offset the forward weight of front-mounted gear like NVGs. If your setup has no front-mounted device, most users will not need one, though some still add one to balance other rail-mounted accessories.
Can I use these accessories on a bump helmet?
Often, yes. Covers, padding, and retention upgrades commonly apply, and some bump helmets accept rails and NVG mounts. Mounting options vary by model, so check what your helmet supports.
What do padding upgrades do?
Padding upgrades improve fit and comfort and help the helmet stay stable on your head during movement and long wear. Look for breathable, adjustable pads that suit your head shape.
How do I balance weight when adding helmet accessories?
Add one accessory at a time and check how the helmet sits. Front-mounted devices such as NVGs pull weight forward, so a rear counterweight or battery pack can help even it out. Wear the helmet with your full kit and confirm it stays level without straining your neck.
How do I clean and maintain helmet accessories?
Follow the manufacturer’s instructions for each product. Inspect straps, buckles, and mounting hardware for wear, let pads dry fully, remove batteries before long-term storage, and keep the kit in a padded bag away from moisture.
What is the difference between mid-cut and high-cut helmet accessories?
The accessory types are similar, but the fit differs. A high-cut shell generally leaves more room around the ears for headsets, while a mid-cut shell sits lower. Covers, pads, and rail placement can differ by cut, so confirm compatibility for your exact helmet.